
Updated on March 13, 2023
Fix an Out Burner on Your Electric Stovetop
One of the most crucial appliances in your house is unquestionably your stove. Even if you’re not much of a home cook, you’ll need a stove to prepare and heat your food. Many recipes need at least two functioning burners, yet most households only have four burners to deal with. A broken burner may be quite inconvenient. This is especially true if it’s your preferred burner.
Is there anything you can do to fix a malfunctioning burner on an electric stovetop? A few at-home fixes may be tried before you enter the realm of heavy-duty repairs. So let’s get started right away and see what can be done to get your stove back up and running.
MAKE SURE YOUR BURNER IS COOL
Make sure you’re not dealing with a hot burner before you begin debugging. Unless your burner has been malfunctioning, this is unlikely, but it’s worth noting in case your burner goes out when you’re preparing supper. While your burner is still warm, avoid attempting any troubleshooting techniques. Before grabbing it, be sure it’s cold to the touch and there’s no heat coming out of it.
The burner stove switch should also be turned off when you are using a burner. When the burner suddenly flames back up, you don’t want to discover your accomplishment with a burn. Begin troubleshooting or repairs only after all burner switches have been turned off for 30 minutes.
WIGGLE THE BURNER IN PLACE
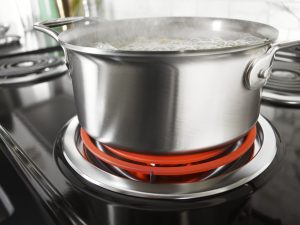
The most popular kind of iron coil burner on electric cooktops is linked to the burner terminal by two prongs. In the event that they come loose or are not properly installed, your burner will lose power and cease to heat.
As a result, the first step in repairing your burner is to simply wiggle it. If it doesn’t settle back into the socket after a few gentle wiggles, give it another go by pushing it gently into the socket terminal. Then, cautiously turn on the burner switch to observe whether it reaches a reddish-orange temperature. If your burner goes red, then your issue was merely a loose socket that has now been rectified.
CLEAN THE BURNER POSTS
The second option is that there was a spill that dripped down the burner and down the posts and caused the problem you’re experiencing. It’s possible to get a crust on your burner posts if you pour the wrong thing at the wrong time. As a result of this, your burner may lose electrical connection to the terminal and cease heating if the posts were loose to begin with.
In this light, we may go to the following phase of our troubleshooting process: an easy one. To clean the posts, take out your burner. Because burners become quite hot, you may need to use a little steel wool and a lot of scrubbing to get rid of the coating on your burner posts. However, be cautious. Damage to the material meant to make contact with the terminal may occur when you scrape off the original coating.
After you’ve cleansed the posts and dried them properly, it’s time to put them to the test. Reconnect the burner’s power cord and turn the power back on. Your work was a success if it shines.
SWAP IT FOR A SAME-SIZE BURNER
When one of your burners stops functioning, try swapping it out with another one of the same size, particularly if the broken burner is near by and you use it often. In order to avoid problems with the switched burner not fitting properly into the socket, make sure the two burners are of the same size.
For a variety of reasons, this method may be quite helpful. The first thing you’re doing is checking to determine whether the burner or the socket is faulty. When a previously dead burner is replaced with a working one, it means that the burner was never the issue in the first place. This indicates that there was no issue with the socket itself, since it now works with the switched burner. If the burner no longer works following the change, this will disclose whether the problem was with the burner or the socket.
It’s not uncommon to discover that after making the swap, both burners are fully functional. Your terminal may have been loose to begin with, and the process of removing and completely resetting the switched burners was all it took to have your stove working properly once more.