
Updated on March 13, 2023
How To Make A Kegerator Out Of A Mini Fridge?
Make Your Own Mini Fridge Kegerator for a fraction of the cost of buying one. Get the right-sized stainless steel or copper coil is the most crucial component of the puzzle.
Coils may be purchased in the plumbing area of your local hardware store or at a draught beer brewing supplies business. If you’re going to convert a refrigerator to a kegerator, look for one that already has coolant tubing holes on the back.
Keg heaters are designed with the specific purpose of holding draught beer in a keg.
Generators have a keg tap built into the lid, which distinguishes them from other refrigerators in the marketplace.
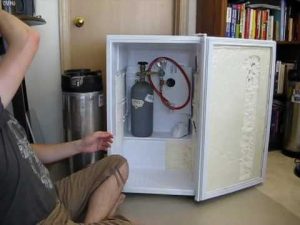
The CO2 tanks that power this faucet may be kept in the refrigerator. This tank pressurises the faucet so that you may draw beer from the generator spout.
While kegs aren’t often used in homes outside of home parties, bars make use of them behind the scenes. They employ specific CO2 tank equipment and tubing to run the pub’s spray and tap hoses.
You don’t need to buy a mini-refrigerator to earn a generator. If you purchase a generator instead of a mini-refrigerator and DIY generator conversion kits, it will cost you anywhere from 1.75x to 3.25x more.
When And Why Do You Want One?
When hosting a party at home, the kegerator is always at its centre. In the event that you have an in-home bar, here is where you may keep your beer on tap and serve it to guests like a genuine bar once they arrive.
The best way to drink a beer is from a keg. Even if you just buy bottled beer, there’s a reason the beer tastes different from what you get at the bar — and a reason you keep coming back.
Even if we go into the specifics of aeration and CO2 use, suffice it to state that the final product is superior than individually packaged beer.
How To Make A DIY Kegerator Conversion Kit Out Of A Mini Fridge?
Step 1: Drilling the Fridge
The most crucial component of the project.
In order to get started, I got a Cylinda 1085 mini-fridger.
Despite its lack of freezer, it’s been in stock at my local store and is compatible with two corny kegs.
Drilling is the next step. If you need to drill, they said, “Don’t,” but if you must, the doorway is the best option. That didn’t work for me, so I threw them away.
Following the refrigerator’s heat, I made my way to the door and opened it. Only the back wall had its attention, with no mention of what was above it.
I made a little hole in the vinyl top using a drill bit.
As a result, I’m able to look around and use a drill bit to drill into the refrigerator. After that, I dug a trench, found a 35mm camera, and summoned it… My stomach was in a knot. Clear the way with no hints of what is ahead. The insulating substance has started to crumble to a degree. 3D printed a couple prototypes, and then siliconed them together to form the final product. Wheels were added to the refrigerator when it was tested.
Step 2: Wheel Board
Put it on wheels when you’re unsure of what to do. removed the standard feet and used a pair of M8 bolts as an adjustable nut to make my own. Slabs of plywood painted black were cut to size and fastened to two wheels each measuring 50 millimetres, two of which could be locked.
Step 3: Countertop and Bar
I didn’t like the way the fridge looked, so I covered the top with some scrap tongue-and-groove floorboards that I’d saved. I dismantled it and drilled a few holes in the faucet tower, pub mountings, and wiring (directed and screen). I sanded and re-coated the gaps after removing and filling them. Then I sandblasted, primed, and painted a U-profile I found on the rubbish dump. The rest of the items were likewise painted by myself.
For this project, I’m utilising softwood, so instead of using a clear varnish, I’m using a blot that I’ve previously used on an exterior furniture piece.
Outer rims; When I got a 7 mm plywood sheet, I then plywooded it up to match the refrigerator’s two sides and the back. As a result, I painted them. Even if I could, I’m not yet ready to rectify them on both sides.
Step 4: Glue on the Materials.
Counter was attached to the refrigerator’s peak using silicone from a prior job. I then applied silicone to the plywood on the sides to keep it in place. Another approach was taken by the back plate. The steel angles I used for this project are from Home Depot. Both the wheel plank and the countertop overhang drew my attention. The plywood was then fastened down using a nut and bolt.
I dyed the whole thing after applying a 25mm trim to the outside.
Step 5: Pipes
I bought a twin faucet tower off of eBay, then a link conversion kit from my homebrew supply store, then somewhere else a soda flow bottle and regulator… The connections were immediate. While each link of my test water was taken by the pre-assembled taps, A 12-mm pipe was positioned above a 6-mm connection… Adding a sleeve between them addressed the problem, which I wish I’d seen earlier.
I used thread tape to keep beer out of everything. For the beer lines, I was counting on the fittings to match, which they did. In addition, I constructed a tiny shelf to which I can attach my keg’s cylinder and which supports it flat. After that, I did the best I could to tidy up my lines by cleaning and trimming them. When the kegs were filled with water and left to carbonate, I evaluated everything that happened.
It Is Time To Start The Party